
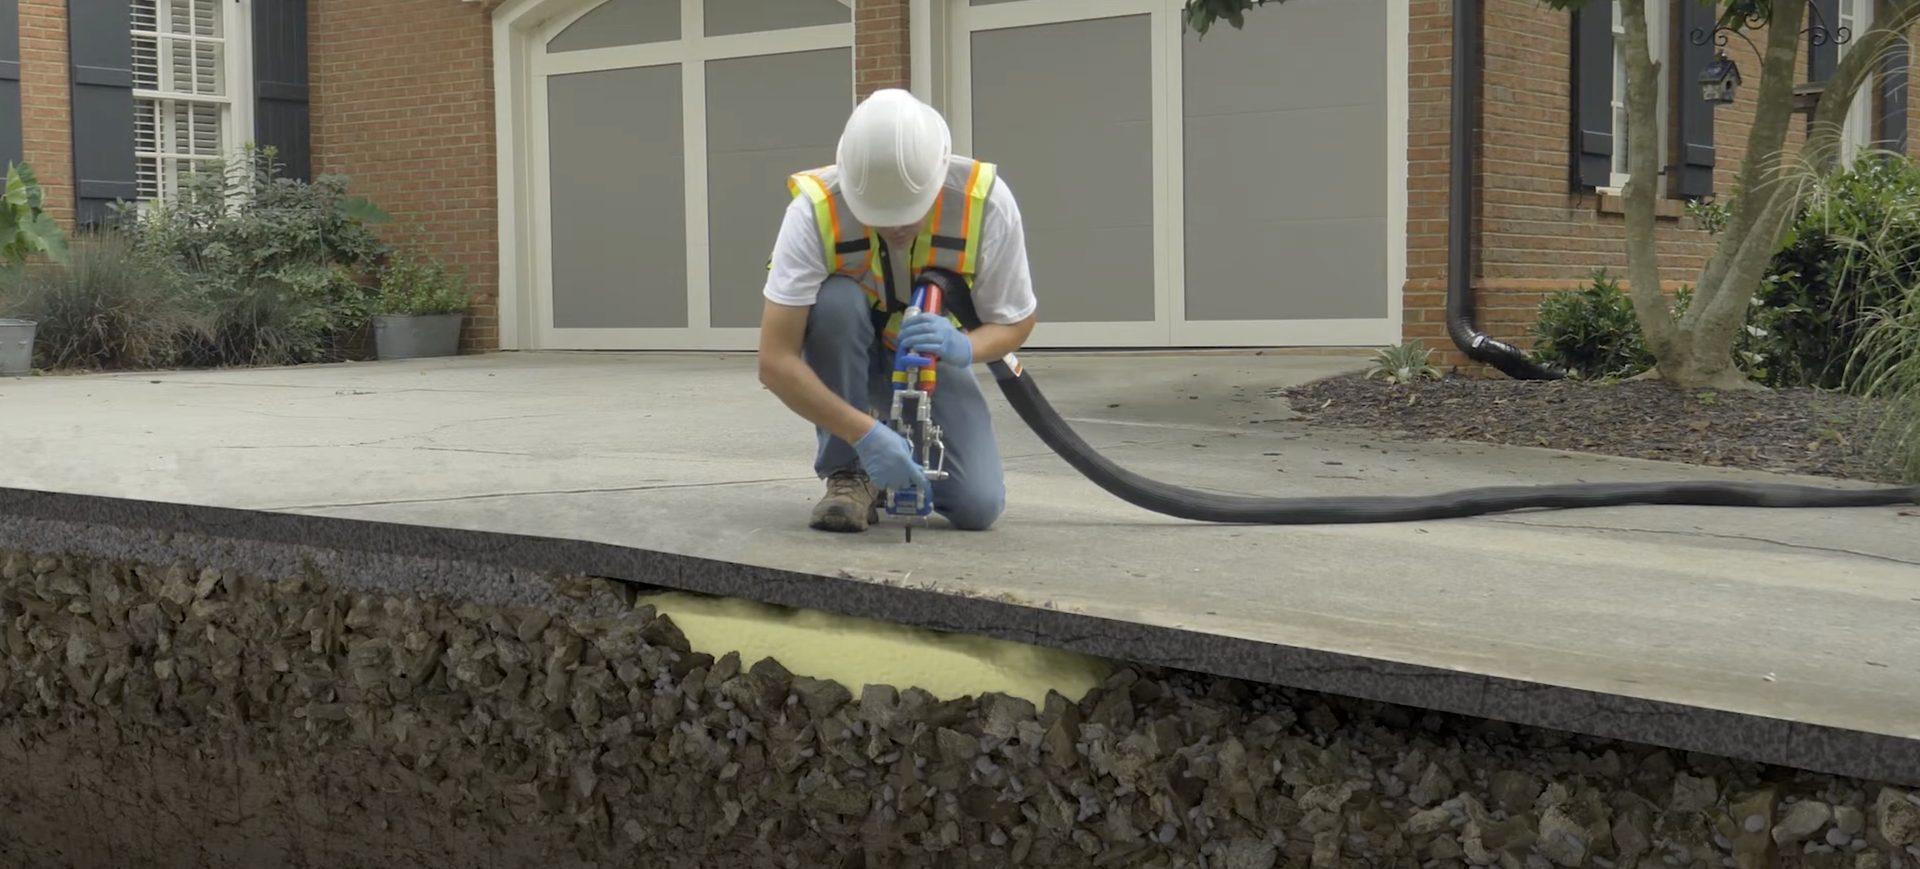
Concrete lifting without tear-out
Concrete Lifting & Leveling in New Mexico & El Paso
We raise sunken driveways, sidewalks, patios, pool decks, and garage floors with polyurethane foam injection: small holes, no demolition. We will tell you up front whether your slab is a good candidate.
Why concrete sinks
Concrete is only as solid as the ground under it. When the soil washes out, settles, shrinks in a dry spell, or was never compacted well, the slab loses support and drops. The low spot is the symptom; part of our job is finding the cause so the fix lasts.
Common signs
- Uneven joints between slabs
- Water collecting in a low area
- Rocking or hollow-sounding concrete
- Gaps below exposed slab edges
- Changed steps or door transitions
- Cracks associated with movement
What we lift
Every surface has its own fixed points and drainage to get right. Pick the one that matches your problem.
Driveway Repair
Sunken panels, the lip at the garage, and water that pools where it shouldn’t.
Learn more →Sidewalk Leveling
Raised and sunken joints that catch toes, wheels, and water.
Learn more →Patio Repair
Slabs that have settled toward the house or left a step at the door.
Learn more →Pool Deck Leveling
Decks that have dropped away from the coping, lifted carefully around plumbing and drains.
Learn more →Garage Floor Leveling
Floors that no longer meet the overhead door, the walls, or the driveway.
Learn more →The repair process
How polyurethane concrete lifting works
Expanding polyurethane foam does the lifting, and careful staging and measuring keep it controlled. Access, slab condition and the work required determine the schedule.
The diagram shows one panel: dime-sized holes are drilled, foam is injected in short shots, it fills the empty space and then raises the slab to the target, and the holes are patched.
- STEP 1
Inspect and measure
We measure how far the slab has dropped, check its condition, and look for what caused it: washout, a leak, bad fill.
- STEP 2
Plan the lift
We pick injection points and a target height that meets the neighboring concrete and drains the right way, working around utilities and anything attached to the slab.
- STEP 3
Drill small holes
A few dime-sized holes through the slab give us access underneath. No saws, no jackhammers, no tear-out.
- STEP 4
Inject the foam
Polyurethane foam expands under the slab and fills the voids. We inject in small stages so the lift is gradual and controlled.
- STEP 5
Watch it come up
We check the slab against the target height and the surrounding surfaces as it rises, and stop when it’s where it belongs.
- STEP 6
Patch and clean up
The holes are patched, the area is cleaned, and we tell you when it’s ready for foot traffic and vehicles. The foam cures in minutes.
Three different jobs
Which fix does your slab need?
Lifting, void filling and replacement get mixed up on the phone. The slab tells us which one it is, and the estimate says so in writing.
Lift it
What you see
A panel has dropped or tipped: a lip at the joint, a step at the door, water running toward the house.
What happens
Foam injected through dime-sized holes fills the space under the slab and raises it to the target.
How a lift goesFill the void
What you see
The slab still sits at the right height but sounds hollow, rocks underfoot, or sheds dirt at the edge after rain.
What happens
The same foam packs the hollow so the slab is supported again, with nothing moving on the surface.
About void fillingReplace it
What you see
The concrete is broken into many pieces or crumbling, or you need a bigger, thicker or reinforced slab.
What happens
We tell you so at the visit. Lifting broken concrete wastes your money, and we would rather say it plainly.
Ask us to look at itLifting is a good fit when
- The slab is in one piece, or a few large pieces, and sound enough to move.
- There’s a clear target: a neighboring slab, a step, a door threshold.
- The cause (drainage, a leak, washout) has been found and can be dealt with.
- Raising it won’t fight with a footing, a wall, or something attached to the slab.
Replacement is the better call when
- The concrete is badly broken up or crumbling.
- You need a different size, thickness, reinforcement, or drainage design.
- Lifting it would create an unsafe slope or step.
- A leak, structural problem, or major erosion issue is still active underneath.
Compare the repair and prepare for a visit
| Option | What changes | What to check |
|---|---|---|
| Foam lifting | Expanding polyurethane fills space beneath an existing slab and can raise a settled panel. | Slab condition, the lift target, drainage, access and anything connected to the panel. |
| Mudjacking | A cementitious slurry is pumped beneath the slab to fill space and raise it. | Added material weight, access holes, soil support and the proposed return-to-use instructions. |
| Replacement | The old concrete is removed and a new slab is built. | Broken or deteriorated concrete, required reinforcement, changes in layout and support preparation. |
What to photograph before requesting an estimate
- A wide view of the whole slab and the building, driveway or yard beside it.
- The low edge or raised joint, with a ruler in view if it can be placed safely.
- Cracks, drains, downspouts and places where water collects after rain.
- Connections to steps, a garage threshold, pool coping or other slabs, plus equipment access.
Photos help start the conversation; the inspection establishes the condition and scope. Mention known pipes, leaks or electrical lines beneath the slab. Lifting does not knit cracks back together, stop an active leak or guarantee that soil will never move again. The written scope should identify the panels, target and limits, visible patches and return-to-use instructions.
How the lifting process works
Inspection, drilling, injection, monitoring, patching, and what to expect after the job.
View the process →Concrete void filling
When the slab hasn’t dropped yet but the soil under it is gone, we fill the void before it becomes a lifting job.
Learn about void filling →Foundation repair
Settled slab foundations lifted, weak soil stabilized, and piers under footings that need to reach firmer ground.
Learn about foundation repair →Guides
Worth reading before you call
Concrete Lifting & Leveling FAQs
Have settled concrete?
Tell us where the slab moved and what it connects to. We’ll tell you up front whether lifting is a good fit and give you a free estimate.